
Connecting a receiver to your television is essential for accessing broadcast channels and enjoying a wide range of entertainment options. The advent of high-definition multimedia interface (HDMI) technology has made the process simpler and more convenient, but not all AV receivers or televisions may have HDMI ports.
Fortunately, there are alternative methods available for connecting a TV to a receiver both with and without HDMI. In this guide, we will explore various options and step-by-step instructions for connecting your TV receiver to your television, regardless of whether you have an HDMI-enabled setup or not. By the end, you’ll have a clear understanding of how to establish a connection and start enjoying your favorite TV shows and multimedia content.
How to Connect a TV to a Receiver With HDMI
Connecting a receiver to a TV using HDMI has become the go-to method for achieving optimal audio and video quality. HDMI cables provide a seamless and high-bandwidth connection, which allows viewers to enjoy a superior viewing experience.
Connecting a TV to a receiver with HDMI is a straightforward process, but the complexity may vary depending on the model-specific information provided. That said, here’s a step-by-step guide on how to connect a TV receiver with HDMI;
- Check compatibility- Ensure that both your TV and receiver support the ARC feature. Look for HDMI ports labeled with ARC or eARC/ARC on your devices. ARC allows the TV to send audio signals back to the receiver, eliminating the need for a separate audio connection. If you’re unsure, consult the product manuals or specifications to confirm ARC support.
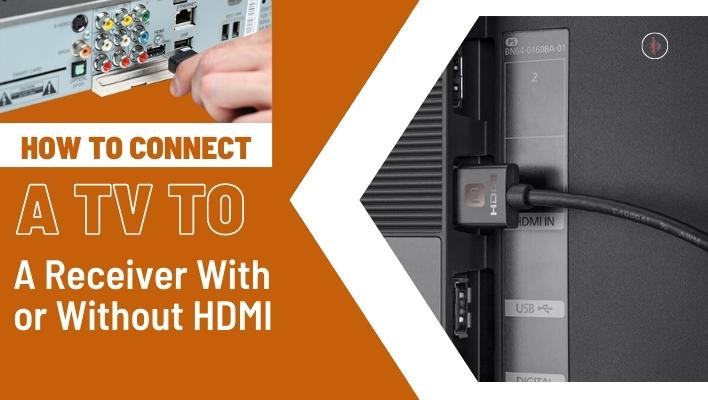
- Connect the HDMI cable- Take an HDMI cable and connect one end to the HDMI port labeled ARC on the TV or the designated ARC port mentioned in the manual. Make sure it is securely connected.
- Connect the other end of the HDMI cable- Connect the opposite end of the HDMI cable to the ARC-enabled HDMI input port on the receiver. Again, ensure a secure connection.
- Power on the receiver- Turn on your receiver and wait for it to boot up. This process may take a few moments.
- Check the TV display- Once the receiver is powered on and connected properly, you should see the receiver’s interface or content displayed on your television screen.
- Enable control for HDMI- On both your TV and the audio system (receiver), enable the control for the HDMI setting. This feature allows the devices to communicate with each other and synchronize operations. Consult the user manual or settings menu of your TV and receiver to locate the control for the HDMI setting. Ensure you enable the control for HDMI settings on both devices.
- Configure the settings- Depending on your TV receiver, you may need to configure some settings to optimize the audio and video output. Refer to the receiver’s user manual for instructions on adjusting settings such as resolution, aspect ratio, and audio output.
That’s it! Once you’ve completed these steps, your TV and receiver should be successfully connected using HDMI. The audio from the TV will now be transmitted to the receiver through the HDMI cable, which simplifies your setup while ensuring high-quality audio reproduction.
How to Connect a TV to a Receiver Without HDMI
While HDMI has become the standard for connecting audio and video devices, not all TVs and receivers may have HDMI ports or be compatible with each other. In such cases, it is still possible to connect a TV to a receiver without HDMI using alternative audio connections.
Connecting a TV to a Receiver Using Optical Digital Cable
Connecting a TV to a receiver using an optical digital cable is an excellent alternative when HDMI is not available or compatible with your devices. The optical digital cable is designed to transmit high-quality digital audio signals allowing you to successfully establish a connection and elevate your audio experience.
Here’s a step-by-step guide on how to connect a TV to a receiver using an optical digital cable;
- Locate the optical audio ports- Identify the optical audio output port on your TV and the corresponding optical audio input port on your receiver. They are usually labeled as “Optical,” or “Digital Audio.”
- Plug in the optical digital cable- Take one end of the optical digital cable and insert it firmly into the optical audio output port on your TV. Ensure a secure connection.
- Connect the other end of the cable- Insert the remaining end of the optical digital cable into the optical audio input port on your receiver. Make sure it is firmly connected.
- Configure audio settings on your TV- Access your TV’s settings menu, usually found in the system or audio settings. Look for options related to audio output or sound settings. Select the optical audio output as the preferred audio output option.
- Set the receiver to the optical input- On your receiver, select the optical input as the source. This can typically be done by pressing the input or source button on your receiver’s remote control until the optical input is displayed or selected.
- Test the connection- Play audio or video on your TV and ensure that the sound is now routed through the receiver. Adjust the volume on both the TV and receiver as needed.
By following these steps, you can successfully connect your TV to a receiver using an optical digital cable. This method allows you to enjoy high-quality digital audio transmission between your devices, enhancing your audio experience while watching movies, TV shows, or playing games.
Connecting a TV to a Receiver Using Analog Audio Cable (RCA)
Connecting a TV to a receiver using an analog audio cable, commonly referred to as an RCA cable, is yet another viable option when HDMI or digital audio connections are not available or compatible. RCA cables transmit analog audio signals and are widely supported by most TVs and receivers.
Here are simple steps for connecting a TV to a receiver using an RCA cable;
- Locate the RCA audio output ports on your TV- Look for the RCA output ports on your TV. They are typically color-coded with red and white, representing the right and left audio channels, respectively. These ports are used for transmitting stereo audio signals.
- Identify the corresponding RCA audio input ports on your receiver- Locate the RCA input ports on your receiver that match the colors of the RCA output ports on your TV. These ports are designed to receive stereo audio signals from the TV.
- Connect the RCA cables- Take one end of the red RCA cable and plug it into the red RCA output port on your TV. Connect the other end of the red RCA cable to the red RCA input port on your receiver. Repeat the same process for the white RCA cable, connecting it between the white RCA output port on your TV and the white RCA input port on your receiver.
- Adjust the volume levels- Set the volume levels on both your TV and receiver to a suitable level. You can adjust the volume individually on each device or use the receiver as the main volume control.
- Test the connection- Play audio on your TV and check if the sound is being transmitted through the receiver. Ensure that the audio output from the TV is routed to the receiver by selecting the appropriate audio output settings on your TV.
Although RCA cables transmit analog audio signals, they can still provide a satisfactory audio experience. This method allows you to enjoy audio playback through your receiver, enhancing the audio quality while watching your favorite content.
Connecting a TV to a Receiver Using an HDMI Converter
Connecting a TV to a receiver using an HDMI converter allows you to bridge the gap between devices that may have different HDMI compatibility or lack HDMI ports. An HDMI converter typically converts the HDMI signal to a different format that can be accepted by the receiver.
Here a simple steps for connecting a TV to a receiver using an HDMI converter;
- Obtain the necessary HDMI converter- Purchase the appropriate HDMI converter based on the type of connection required. Ensure that the converter supports the desired input and output formats, such as HDMI to RCA, HDMI to optical, or any other required format.
- Connect the HDMI converter to the TV- Plug one end of the HDMI cable into the HDMI output port on your TV. Connect the other end of the HDMI cable to the HDMI input port on the HDMI converter.
- Connect the converter to the receiver- Using the appropriate cables or connectors for the desired output format, connect the HDMI converter to the corresponding input port on your receiver. For example, if you are using an HDMI to RCA converter, connect the RCA cables from the converter’s output ports to the corresponding RCA input ports on the receiver. If you are using an HDMI to optical converter, connect the optical cable from the converter to the optical audio input port on the receiver. Ensure all connections are secure.
- Power on the devices- Turn on your TV, receiver, and any other connected devices. Make sure they are set to the appropriate input sources.
- Configure audio settings- On your TV and receiver, navigate to the audio settings to ensure that the audio output is directed to the connected receiver. This may involve selecting the correct input source or audio output settings on both devices.
- Test the connection- Once more, play audio or video on your TV and verify that the sound is being transmitted through the receiver. You may also want to adjust the volume levels on both the TV and the receiver as needed.
The Bottom Line
Connecting your TV to a receiver opens up a world of immersive entertainment. While HDMI remains a popular and convenient method of connecting a TV to a receiver, it’s important to keep in mind that there are alternative options available. By utilizing one of the connection options discussed above, you can successfully unlock the full potential of your audio system, immersing yourself in rich and powerful sound.