
Amplifiers increase the audio signal voltage and make it powerful enough to drive massive speakers and subwoofers. If you’re new to car audio, testing your amplifier for underlying issues without good guidance could bring more harm than good.
This article provides a detailed guide on how to test a car amplifier with a multimeter. Learn more about common electrical issues that affect car amplifiers and how to fix them DIY-style.
Getting To The Basics: How Does a Car Amplifier Work?
Good music is incomplete without excellent speakers, the perfect environment, and a top-quality amp working behind the scenes. But if you run your speakers alone, the sound quality from your high-quality may not be as impressive as you expected. Power amplifiers breathe life into your music and bring out crystal clear sounds at a high volume output.
Car amplifiers work with transistors that control the strength of the input signal and increase its current before sending it to the speakers. Essentially, transistors control the size of the outgoing current depending on the voltage of the incoming signal.
Amplifiers work with aftermarket speakers, receivers, and subwoofers to add a life-like experience to your music.
With that being said, we’re now going to look into how a multimeter works.
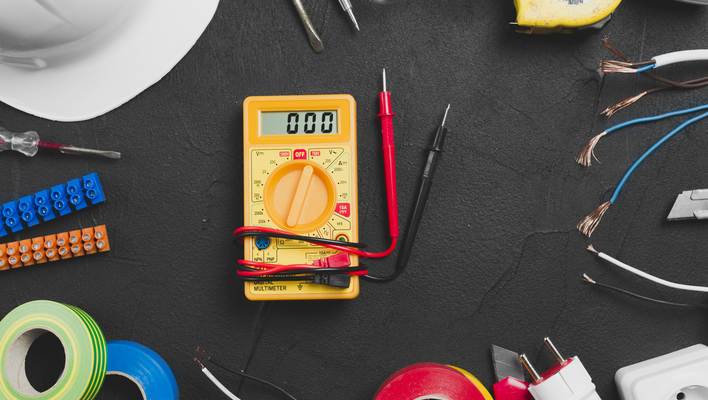
How A Multimeter Works
A multimeter measures the electrical voltage between two points. There are several multimeters; standard multimeters measure current, resistance, and voltage. And the more expensive type that can measure capacitance and inductance.
Generally, multimeters combine three main functions (current, resistance, and voltage) into a single device.
- The ammeter measures the current (number of electrons passing through one point in a specified time. It is measured in amperes: the higher the amperes, the more current.
- The voltmeter is designed to measure the electrical potential between two points in volts.
- The Ohmmeter measures the opposition to the flow of an electric current.
Additionally, a digital multimeter comes with two color-coded leads. Red stands for the positive (+) terminal, while black is the negative (-) terminal (also ground). A multimeter will also have at least two probes for the connection.
How To Test A Car Amplifier With A Multimeter The Easy Way
Here, you’ll need a high-quality multimeter for accurate results. You can get a good quality multimeter from any electronic store or order it online.
First of all, make sure that your multimeter is set up correctly. When testing your car amp, you need to set up the multimeter according to its number of channels. Your multimeter will also have a limit for the maximum voltage and currents it can take. You’re not supposed to exceed this limit. Instead, use it as per the manufacturer’s instructions.
- Set your multimeter to VDC
- Turn the knob till it reaches the 20V mark
- Test for voltage at the live and ground wires
1. Set Your Multimeter to VDC
The digital multimeter is divided into different settings; VDC (direct voltage-current) and VAC (alternating voltage-current). When testing appliances powered by your home’s power supply, you’ll need to use a VAC setting. However, when checking a car amplifier, you need to use the VDC setting.
2. Turn the Knob Over to the VDC Setting Until it Reaches the 20V Mark.
Car amps generally operate at 20V. So, setting the multimeter to the VDC 20V mark means that the device can measure up to 20 volts of direct current.
3. Test for voltage at the live and ground
Using the power and ground probes on the multimeter, test for voltage at the positive and ground terminals in the amp. Depending on your charging system, it could show a value between 11V-14V or slightly higher.
Testing your amp varies with the kinds of issues it might have. Perhaps there’s a power supply issue or a speaker issue. With the multimeter probes hooked to your amp’s power and ground, turn up the volume and see if you can spot any voltage drop.
A drop in voltage indicates a power issue. Check the power supply lines from the battery for any signs of physical damage and check the connection points to the battery.
How To Test Your Car Amplifier With A Multimeter The Professional Way
If the easy way doesn’t do it, you can try the professional way. First of all, you need to configure your amp correctly and then test it with a multimeter. Here’s how to test your amp with a multimeter, as the pros do.
- Locate the Amplifier
- Check the fuse
- Test the safety mode and see if it works
- Verify the results
1. Locate the amplifier –
Several vehicle models come with a factory amplifier. However, where they’re installed depends on the car manufacturer. Otherwise, you may have installed yours behind the seats, on the dashboard, or in the trunk.
2. Check the Fuse
Make sure the car amplifier’s power fuse is in good working condition. You can check the voltage of the amplifier’s fuse to see if it’s working. Place one probe on one end of the fuse and the second probe on the other end of the multimeter. A positive reading indicates that it works.
3. Test your amp’s safety mode and see if it works
Your car amplifier enters safe mode to protect itself from more harm. For instance, faulty installation, faulty wire contacts, or internal failure can make the car amplifier enter safety mode at a high volume.
First, turn on the amplifier and play your music. If it enters safety mode soon after turning it on, something is wrong. Use a multimeter to check the amp’s voltage through the connecting wires.
4. Verify the results –
Test and make sure the voltage coming from your amplifier is right. Find the speaker outputs on your amp. Next, put your multimeter on AC mode. Place one probe on one speaker terminal and the other probe on the second terminal. Slightly raise the volume. The voltage reading should increase as you raise the volume.
You can also use the power in and power out terminals. Place the multimeter probes on the positive and negative terminals. Turn off your engine. The multimeter should read 12V and rise once you turn on the engine.
How can you fix your car’s amplifier?
Voltage tests using a multimeter may reveal several issues with your amp, including power issues, faulty wiring, and internal amp issues.
Fix your car amplifier by disconnecting all wiring to the amp except the remote, ground, and power cable. Next, check any loose connections, bolts, and screws in the amp’s wiring. Finally, reconnect everything and play some music.
If you’re not sure how to put the wires back together and reconnect your amp, we’ve got you covered.
Adjust The Gain Control
A digital multimeter can help you adjust the gain control on your amp and make an impact on your music quality. Gain is the ratio between the output amplitude divided by the amplitude of the input.
First, you want to measure the speaker impedance using the multimeter. Not sure how to test positive and negative speaker wires with a multimeter? Cut off the speaker’s power supply and identify the positive and negative terminals. Then, connect the positive and negative multimeter probes on their respective speaker terminals.
Also Read: Why Does My Car Stereo Keep Resetting? How to Fix It
Check the manufacturer’s stated output in Watts from the manual. The next step involves some math. It’s about calculating the AC voltage your amp requires. Note down this formula: V = √(P.R.)
V= Required AC Voltage
R= Resistance in Ohms
P= Recommended Wattage
Say that you have a 500 Watt amp, and the speaker impedance you calculated in the previous came to 4 Ohms.
V = √(500 x 4)
V = √(2000)
V = 44.72
Now, disconnect all wires, speakers, and subs. Set the gain on your amp to zero and adjust the volume knob to 75%. Connect the positive and negative probes to the amp’s respective positive and negative terminals using your multimeter.
Slowly adjust the gain knob while observing your multimeter and stop once it gets there.
Conclusion
Now you know how to test a car amplifier with a multimeter. Car stereos are now more complicated than ever, but that doesn’t mean that you can’t get the most out of yours. If you face any problems while testing your amp, feel free to ask a question, and we’ll get back to you.