
Sony headphones are among the pioneers in the industry and they are some of the best headsets you can buy. Most Sony headphones have outstanding battery life, and are super comfortable to wear all day. Additionally, the headphones are pretty simple to use since you only need to just connect or pair them with an appropriate device, and you’re good to go.
If you have recently bought a brilliant pair of Sony headphones and looking to experience the best possible performance, this article is for you. We’ll cover the basics of connecting Sony headphones to a MacBook to help ensure that you get the best from your new headphones.
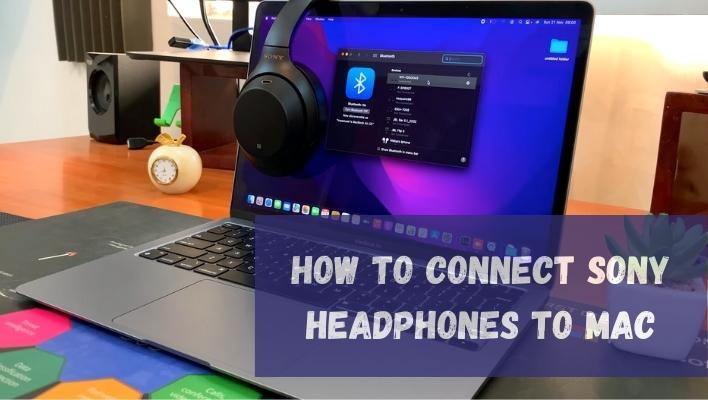
How to connect Sony headphones to Mac
While the actual procedure can vary depending on the type of headphones you’re using, the connection process is always straightforward and simple to master. Now, before you attempt to connect Sony headphones to Mac, you’ll need to ensure that;
- The volume level of your MacBook is turned up.
- You may also want to ensure that your computer speaker is set ON; if the speaker is turned OFF you’ll not be able to hear any sound from your headset.
- Ensure that all the drivers you need to connect the headphones to your computer are installed and updated.
- Make sure your computer is compatible with the required Bluetooth profile for connecting headphones. In this case, the recommended Bluetooth profile is the A2DP (Advanced Audio Distribution Profile).
- In addition, you may need to activate the Bluetooth Adaptor, but this will vary depending on the operating instructions of your Mac.
- Ensure that your headset is within 3 feet (approximately 1 meter) of the computer.
- Also, ensure that your headphone is fully charged.
As we have already mentioned, connecting Sony headphones to Mac may vary depending on your specific model and the OS (operating system) of your computer. That said, here are the steps for connecting your Sony headphones to a MacBook;
Activate the headphones pairing mode
Activating the headphones pairing mode helps to make it discoverable by your computer. Again, the actual steps for activating the pairing mode on your headphones may vary from one device to another, and as such, you may want to consult your user manual for specific instructions. But in most applications, you’ll only need to press and hold your headphones’ power button for up to seven seconds to turn on the pairing mode.
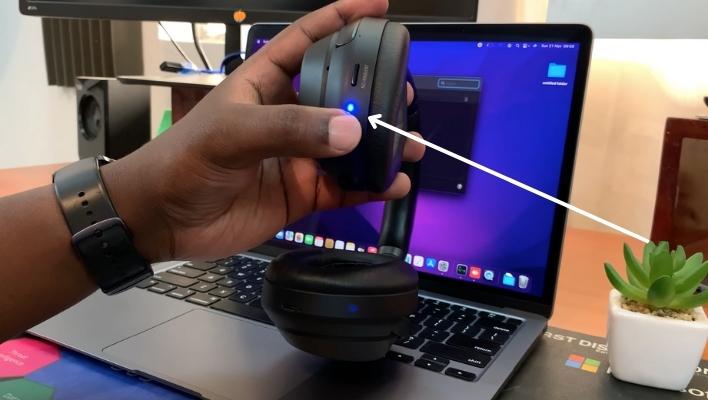
However, some models, like the Sony WH-1000XM4, are designed to automatically go into pairing mode when using them for the very first time. You’ll, however, need to initiate the pairing process using the power button for subsequent uses.
Check the headphones indicator light, and if it blinks (blue) two times in a row, then the pairing has been successfully activated. You should also be able to hear a voice note letting you know that there is an ongoing ‘Bluetooth pairing’.
Activate Bluetooth settings on your Mac
The next thing you’ll need to do to connect Sony Bluetooth headphones to Mac is to activate Bluetooth settings on your computer. First off, you may need to ‘wake up’ your computer if it is in sleep/hibernation mode.
Next, go into the Bluetooth settings of your Mac, and turn on the Bluetooth. By doing so, you’ve now made your MacBook discoverable and ready to pair with your headset. If you’ve already activated the pairing mode on your headset, then it should be visible on your computer Bluetooth list.
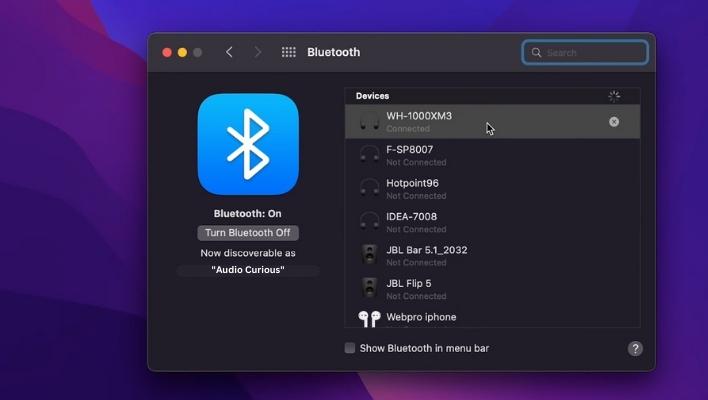
Pairing your devices
Scroll down your Bluetooth list until you identify your specific headphones model on the list. If you still can’t spot your device, scroll down further on the menu to see if it is hidden at the bottom. Alternatively, you can click the refresh button to refresh your settings. The process may take up one minute for your device to be displayed.
Once you spot your device, select it and then click the pairing/connect button. If a passcode/password is required, input the stipulated code on the user manual. For instance, the passcode for Sony WH-1000XM4 that we’ve mentioned above is “0000”.
At this point, your Sony headphones and Mac are successfully connected and ready to work with each other. Again, you should be able to hear a voice note letting you know that Bluetooth is successfully connected.
Next, select the speaker icon on the computer and click on your device to activate the operation. You’ll also need to check different sound settings from the Bluetooth menu and select your preferred audio settings. At this stage, all is set, and you can now stream any content and listen to music using your Sony headphones.
Tips for connecting Sony headphones to Mac
- If you can’t pair your devices within five minutes, the pairing process will be canceled automatically. If you can’t connect Sony headphones to Mac, then you’ll need to refresh your computer and start the process afresh.
- Once you have paired your headphones to your Mac, you’ll not need to pair your devices again except when you’ve accidentally deleted the pairing information. In addition, if your headset is formatted, the pairing information is lost, so you will need to pair the devices again.
- Like other Bluetooth-enabled devices, you can pair your Sony headphones with more than one device, and in this case, you can pair them with up to eight devices. However, you can only stream or play music from one connected source at a time.
Conclusion
Whether you are a veteran or new to the world of Bluetooth headphones, we hope you’ve picked a few tricks on how to connect Sony headphones to Mac. The best thing is that once you’ve successfully paired the headphones to your Mac, you don’t need to go through the initial pairing process to reconnect in the future. All you need to do is to go to the Bluetooth menu on your Mac and connect to your headphones, and you’re good to go.