
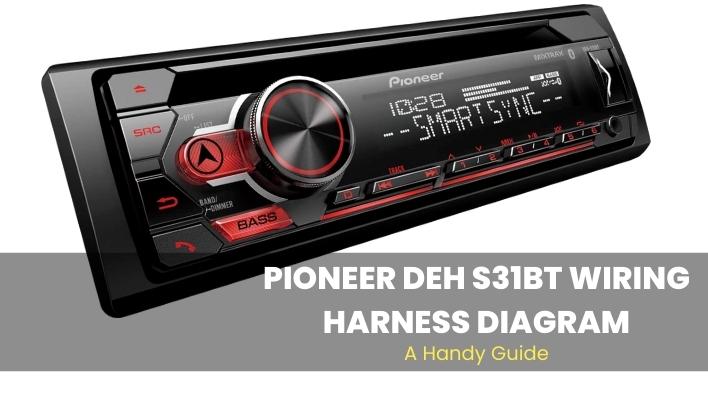
The DEH S31BT single din in-dash car receiver from Pioneer generally checks all the boxes for most car audio enthusiasts. For instance, it supports android connectivity through the front USB input, which allows you to plug and listen to music from any Android-compatible device. Furthermore, it is equipped with an easy-to-use interface that helps you make your driving experience as enjoyable as possible.
Installing DEH S31BT can be a daunting task, especially if you are doing the installation for the very first time. However, wiring the receiver should not be necessarily intimidating provided that you take your time to get the hang of the wiring diagram for Pioneer DEH-S31BT. In this write-up, we’ll cover every detail of wiring the DEH S31BT and show you several tips for connecting this head unit.
Pioneer DEH S31BT Wiring Diagram
The first thing you’ll need to get when installing the receiver is the wiring harness adapter. The adapter allows you to tap into the existing car wiring, thereby making it easy to connect the head unit to your car stereo system. In addition, the adapter allows you to make connections that are not only secure but also long-lasting.
By following the wiring harness diagram illustrated below, you can be assured that the connections are safe and that the unit will keep going for years to come. But before that, you’ll need to understand the basics of your specific car system.
Ideally, a standard car stereo system is composed of four speakers (i.e. two front speakers and two rear speakers ). Now, for each of these speakers, you’ll need to run two separate connections, one for the positive terminal and another one negative terminal. That means that you’ll need to make a total of eight connections for the speaker system, as illustrated below;
Grey color- Represents the cable for the right front speaker (positive terminal)
Grey/ black stripe- Represents the cable for the right front speaker (negative terminal)
White color- Represents the cable for the left front speaker (positive terminal)
White/black stripe- Represents the cable for the left front speaker (negative terminal)
Purple color- Represents the cable for the right rear speaker (positive terminal)
Purple/black stripe- Represents the cable for the right rear speaker (negative terminal)
Green color- Represents the cable for the left rear speaker (positive terminal)
Green/black stripe- Represent the cable for the left rear speaker (negative terminal)
Now when connecting your speakers, you’ll only be required to color match these color codes with your wiring harness adapter. Once all the wires are matched, you’ll then need to plug the wiring harness into the head unit wiring system, and you’re good to go.
Apart from speaker wires, the car stereo systems also include additional cables that allow you to plug the head unit into the car’s electrical systems. They include;
Yellow wire- The yellow cable is basically a constant 12V which provides power from the car battery
Red wire- This is used for ignition purposes. The wire is attached to the stereo, and just like the battery cable, the ignition wire also delivers constant 12 volts.
Orange wire- Represents the cable for dash light illumination.
Black cable – Like in other electrical applications, the black wire is connected to the ground.
Blue cable – The blue wire is used as the remote turn on. For this application, you’ll need to connect the remote turn-on wire to the car’s electrical system. The wire is only triggered when the ignition key is in the ON position.
For best results, you may want to ensure that your wiring harness is compatible with both your vehicle and the DEH S31BT. The best thing is that wiring harnesses are readily available, and you can use various online tools to help you pick the right harness for your head unit. That said, below is a simplified Pioneer DEH S31BT wiring harness diagram to guide you with the installation;
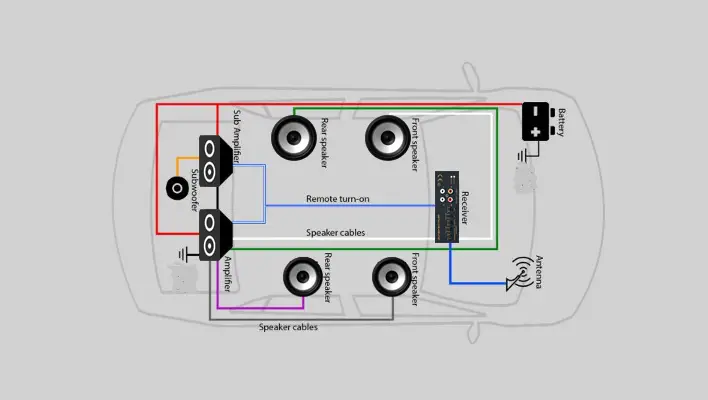
For most applications, the user will only need to understand and follow the diagram outlined in this guide. Ideally, all you need to do is to match the head unit colors with those of the harness and then plug it into your car wiring system, and you are good to go. The Pioneer DEH S31BT installation manual will also prove valuable to anyone who is not well versed with aftermarket wiring color codes.
Related: Pioneer DMH 1500NEX Wiring Diagram and Key Features
How to Install Pioneer DEH S31BT without the Wiring Harness
Using a wiring harness is undoubtedly the easiest and safest way of installing an aftermarket car stereo, but that does not mean you can’t install your unit without one. If you’re unable to access an appropriate harness for your head unit, you can still connect the components manually.
To achieve this, you’ll still need to keep the wire color codes at your fingertips. Now, the easiest way to connect your head unit without a wiring harness is by soldering the corresponding wires together. The soldering process is relatively easy provided that you have basic experience in cutting and joining two wires together.
The second method you can use to install your unit without the harness is using a pigtail to help you connect the wires directly. Once you’ve positively identified the colors of the power wires, speaker wires, ground wire, and the remote turn-on cable, all you need to do is attach them to the equivalent wires on your car stereo. After all the wires are connected, you’ll need to wrap them together using an appropriate wiring tape to ensure a secure connection.
Frequently Asked Questions
Q: Are all Pioneer head unit wiring harness the same?
General most aftermarket car stereo systems use standard color codes to make it easy to upgrade from one unit to another. This means no rewiring is necessary, but the number of wires used may vary from one car audio application to another.
Q: Do I need a wiring harness to install Pioneer DEH S31BT
A wiring harness makes it easy to match the DEH S31BT wire colors but does not necessarily mean you can’t do without one. It is still possible to connect your unit manually, as we’ve discussed above, but the job is much more physically demanding.
Parting Shot!
Installing Pioneer DEH S31BT is definitely not for the faint-hearted, but it should be manageable once you comprehend the wiring diagram. In addition, getting a suitable wiring harness will allow you to do the installation effortlessly, but you may want to pay close attention when choosing a wiring harness for your car stereo system.