
Setting up a home theater is a journey that involves a lot of deliberation to make the best choices. While having great picture quality is important, it is just one aspect of the fun home theater experience. The true essence is to balance the output levels for all audio channels to ensure a consistent sound experience.
When the levels are unbalanced, some channels may dominate the audio, leading to an inaccurate representation of the intended soundstage. To make your home theater truly exceptional, it’s crucial to get your speakers calibrated just right.
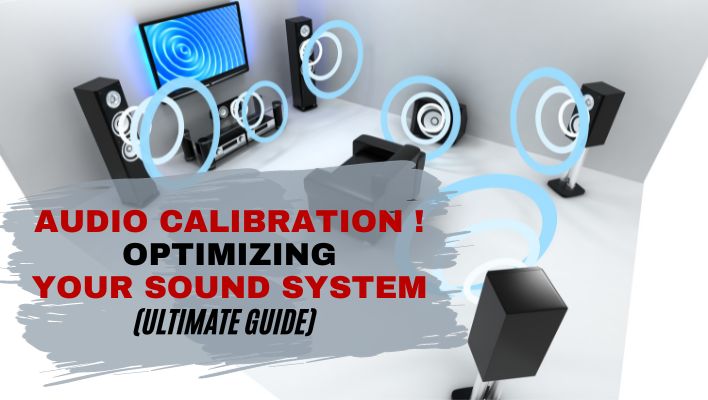
Audio calibration is about making sure the sound is just how it’s supposed to be – not too loud, not too soft, but just right. You can think of it as giving your speakers or home theater a bit of pampering.
Audio Calibration Overview
Audio calibration is the art of optimizing the settings of your audio equipment to achieve the best possible sound quality. This process involves adjusting various parameters such as volume, timing, and frequencies to ensure that your speakers deliver an accurate and immersive audio experience. The goal of calibration is to achieve accuracy in sound reproduction. In other words, calibration ensures that what you hear is a true and accurate representation of the original audio.
That’s not all. Calibration is designed to optimize your system for the space it’s in. Calibrating your speakers allows them to adapt to different room acoustics for the best possible performance. Beyond technicalities, calibration allows for a personalized audio experience. This process tailors the sound to your preferences, making sure you feel every beat, note, or whispered dialogue according to your liking.
Importance of Audio Calibration for Balanced Sound
If you’ve ever watched a movie where the explosions drown out the dialogue, you know how annoying it can be, right? Well, here’s where audio calibration steps in to save the day. Most AV receivers provide a way to adjust the relative levels for each channel individually, ensuring that they all sound equally loud to your ears.
This, in turn, allows you to fine-tune your audio experience for a balanced and immersive sound. Some of the key benefits of calibrating your sound system include;
Avoids overwhelming audio elements
Calibration helps prevent any one aspect of the audio, such as the bass or treble, from overpowering the others. This interaction ensures a more enjoyable and comfortable listening experience without any jarring elements.
Enhanced clarity
Calibration helps improve the audio clarity by fine-tuning audio settings for each channel. This means that both softer tones and louder beats are delivered with precision, making the listening experience more enjoyable.
Creates a harmonious blend of frequencies
Audio calibration facilitates a seamless blend of frequencies, which guarantees a well-rounded sound profile. This not only ensures a pleasurable listening experience but also allows you to hear every detail with precision. In addition, a well-calibrated system enables you to account for varying speaker placements and differences in speaker efficiencies.
Adapts to Different Genres
Balanced sound is essential for enjoying different genres of music or types of media. Calibration allows you to tailor the audio settings to suit the specific characteristics of each genre, thereby providing an optimal listening experience across various content types.
Step-by-Step Guide for Speaker Calibration
The success of the calibration process hinges on getting the basics right from the start. One of the critical elements in calibrating your home theater system is ensuring proper positioning of your speakers. So before you embark on calibrating your sound system, you may want to ensure your speakers are correctly positioned and connected securely.
Always feel free to experiment with speaker placement to find the optimal configuration for your room and preferences. While doing so, you’ll need to consider the layout of your room and aim for a balanced distribution of sound.
Ensure that there are minimal obstacles between the audio source and the listener to allow for clear transmission of sound. You’ll also need to take into account the acoustics of the room, such as the presence of curtains, carpets, or other materials that may impact sound.
Equally important, run a quick test to ensure that all your speakers can produce sound. This will help ensure that your audio system’s components are operational and ready for the calibration process.
You can read more on speaker placement in our comprehensive speaker placement guide.
Speaker Calibration Techniques
Step 1# Ensure on-screen display visibility
The first step of the calibration process is ensuring the visibility of your receiver’s on-screen display on your TV. This is crucial for accessing and adjusting the necessary calibration settings. Check that the display is clear and accessible before you proceed with the calibration process.
Step 2# Familiarize yourself with the receiver’s menu
Take the time to navigate through the menu settings. Get familiar with the available options to allow you to make precise adjustments to your audio settings.
Step 3# Measure the distance to the central listening position
Measure the distance from each speaker to your central listening spot. This enables the Av receiver to determine exactly what actions are necessary for you to enjoy well-calibrated, high-quality sound. Input the distance measurements into your receiver. The receiver will prompt you to enter these measurements in increments to ensure accurate timing for audio signals.
Step 4# Determine speaker crossover setting
Understanding and configuring speaker crossover settings is crucial for optimal calibration. If you have a modern receiver, you’ll need to set crossovers individually for each speaker, especially if they are of different sizes. Also, ensure you adjust the crossover settings based on the manufacturer’s recommendations.
That said, it’s advisable to set the speaker crossover to approximately 20Hz above the recommended crossover frequency. This is because as you approach the maximum capabilities of your speakers, their performance may start to diminish, leading to a noticeable difference in sound quality.
As such, the extra 20Hz ensures that your speakers operate within their optimal range. For instance, if the recommended speaker crossover is 80Hz-100Hz, it is best to set the crossover at 100Hz- 120Hz to account for performance variations and maintain optimal sound quality.
Step 5# Speaker Calibration
Now that you’ve configured your receiver with speaker location, seating distance, and crossover settings, it’s time to calibrate the speakers. The easiest part about calibrating speakers is that most receivers come with auto calibration systems, which allow you to fine-tune your sound output automatically. In addition, you can do it solely by ear, but for more accurate results, using a decibel meter is recommended.
Calibration Tools and Equipment
Achieving optimal audio quality requires the use of specialized tools and equipment designed for calibration purposes. The basic tools and equipment you’ll need to calibrate your audio system for optimal sound include;
Sound Pressure Level (SPL) Meter
An SPL meter, also known as a sound level meter or decibel meter, is a device designed to measure the intensity of sound in decibels. It quantifies the pressure variations caused by sound waves in the air and provides an objective measure of the loudness or volume of a sound.
SPL meters play a crucial role in audio calibration by measuring sound intensity and ensuring a uniform and balanced volume level across audio channels. This allows for precise adjustments of speaker volumes, which contributing to an accurate and harmonious audio experience.
Calibration Microphone
A calibration microphone is a specialized microphone designed for the precise measurement and adjustment of audio equipment. Unlike standard microphones used for recording or amplifying sound, calibration microphones are engineered to capture sound signals with high accuracy and minimal coloration. This plays a crucial role in refining speaker levels, achieving system balance, and fine-tuning audio settings.
Calibrating Speakers by Ear
- Place the calibration microphone at your central seating position. This is typically where you’ll be experiencing most of your audio content.
- Navigate to the calibration or speaker setup menu on your receiver. This can usually be found in the settings section.
- Follow the on-screen instructions to initiate the calibration process. This may involve selecting an option like ‘Auto Calibration’ or ‘Speaker Setup.
- Ensure the microphone is positioned at ear level and oriented towards the ceiling. Hold it at arm’s length, avoiding pointing toward individual speakers.
- Activate a test tone using the receiver’s speaker level settings. The tone will be played through each speaker, and the microphone will capture the audio response.
- At this point, the receiver will automatically analyze the test tone results and make adjustments to the volume and timing of each speaker. This will, in turn, ensure a balanced and synchronized audio output.
- Once the calibration is complete, review the settings on your receiver. Ensure that each speaker is adjusted appropriately, and there are no significant volume imbalances. Finally, save the calibration settings on your receiver.
When calibrating your speakers by ear, you’ll need to aim for consistency in sound across all speakers. Start with one speaker, adjust its volume to your satisfaction, and then ensure the subsequent speakers match this level. When done correctly, it facilitates easier identification of discrepancies, making it simpler to pinpoint and rectify any deviations in volume across the speakers.
Calibrating Speakers using SPL Meter
- Sit in your central seating position to establish a reference point for evaluating audio levels.
- Set the SPL meter to your preferred level, preferably around 70 dB. However, you can tailor the decibel setting according to your room acoustics and desired listening experience.
- Configure the meter with “C” weighting and “Slow” response settings. The “C” weighting allows you to closely match the human ear’s sensitivity to different frequencies. On the other hand, the “Slow” response offers a stable reading that averages measured levels over a longer time.
- Hold the meter at arm’s length, pointing the microphone towards the ceiling. Maintain consistency by holding the decibel meter at arm’s length and avoid direct exposure to individual speakers that could skew results.
- Access your receiver’s calibration or speaker setup menu to activate the test tone. This tone will play from each speaker, allowing the decibel meter to capture the audio response from each channel.
- Adjust each speaker’s volume until the decibel meter reading aligns consistently across all channels. Strive for uniform readings across all channels to ensure each speaker contributes proportionally to the overall sound without significant variations.
- You may need to go through each channel multiple times until you achieve consistent readings on the meter for all channels. Don’t hurry; simply take your time and practice a bit of patience during the process.
Subwoofer Calibration
- Ensure your subwoofer is correctly placed in your room. Common placements include corners or along the front wall for optimal bass distribution.
- Access the subwoofer settings on your receiver calibration menu or audio settings.
- Use your receiver’s settings to initiate a test tone specifically for the subwoofer. This tone is designed to help you assess and adjust the subwoofer’s performance.
- Begin with the subwoofer volume at its minimum level. Gradually increase it until you reach a point where the bass is prominent but not overpowering.
- Listen to various audio tracks, including those with deep bass, to evaluate the quality of the subwoofer’s output. Pay attention to clarity, depth, and integration with the overall sound.
- Fine-tune the subwoofer settings in small increments. Avoid drastic changes to maintain a balanced and natural bass response. Once satisfied with the subwoofer calibration, save the settings on your receiver.
Conclusion
Audio calibration helps tailor your setup to fit the unique features of your space, making sure you get the best sound experience possible. As you embark on this journey, remember that calibration is a personalized art. As such, you may want to take time to experiment with different techniques and settings to discover the audio landscape that resonates most with your preferences.